Design
the plan
After the intial quick fixes that came with moving in, we spent our first winter (2006) thinking about design and trying to come up with an overall plan for chezerbey. In addition to making some much needed updates in every part of the house, our primary goal was to come up with a design that would maximize our space as much as possible. We went through at least 10 different floor plan ideas and ultimately decided on the drawings that you see below [click on the images to enlarge].
basement before
The basement was sort of finished. There was wall board, a cedar wardrobe, some carpet remnants, and of course the “Indestructo” furnace. The L-shaped stair had been added at some point, though inconveniently built around the exhaust chimney. The “retaining wall” between the basement and crawl space was wood and needed to be replaced.
basement redesign
The structural part of the basement remodel has been completed (new concrete retaining wall, new beams, new posts, new slab in the crawl space to create the “short basement” storage area). The furnace and hot water heater are gone (the new furnace is in the short basement, the tankless hot water heater is outside). The old wall board, carpet, and wardrobe are gone and we insulated and completed a seismic retrofit to the exterior walls. With all of the unglamorous work complete, the next step will be to finish the space. Right now we’re in the process of dividing the space into a laundry room and bathroom on one side and a media/den/guest room on the other. Fortunately, with the entire short basement portion for storage, we really don’t need to dedicate any of the full height basement for that purpose (yay!).
main floor before
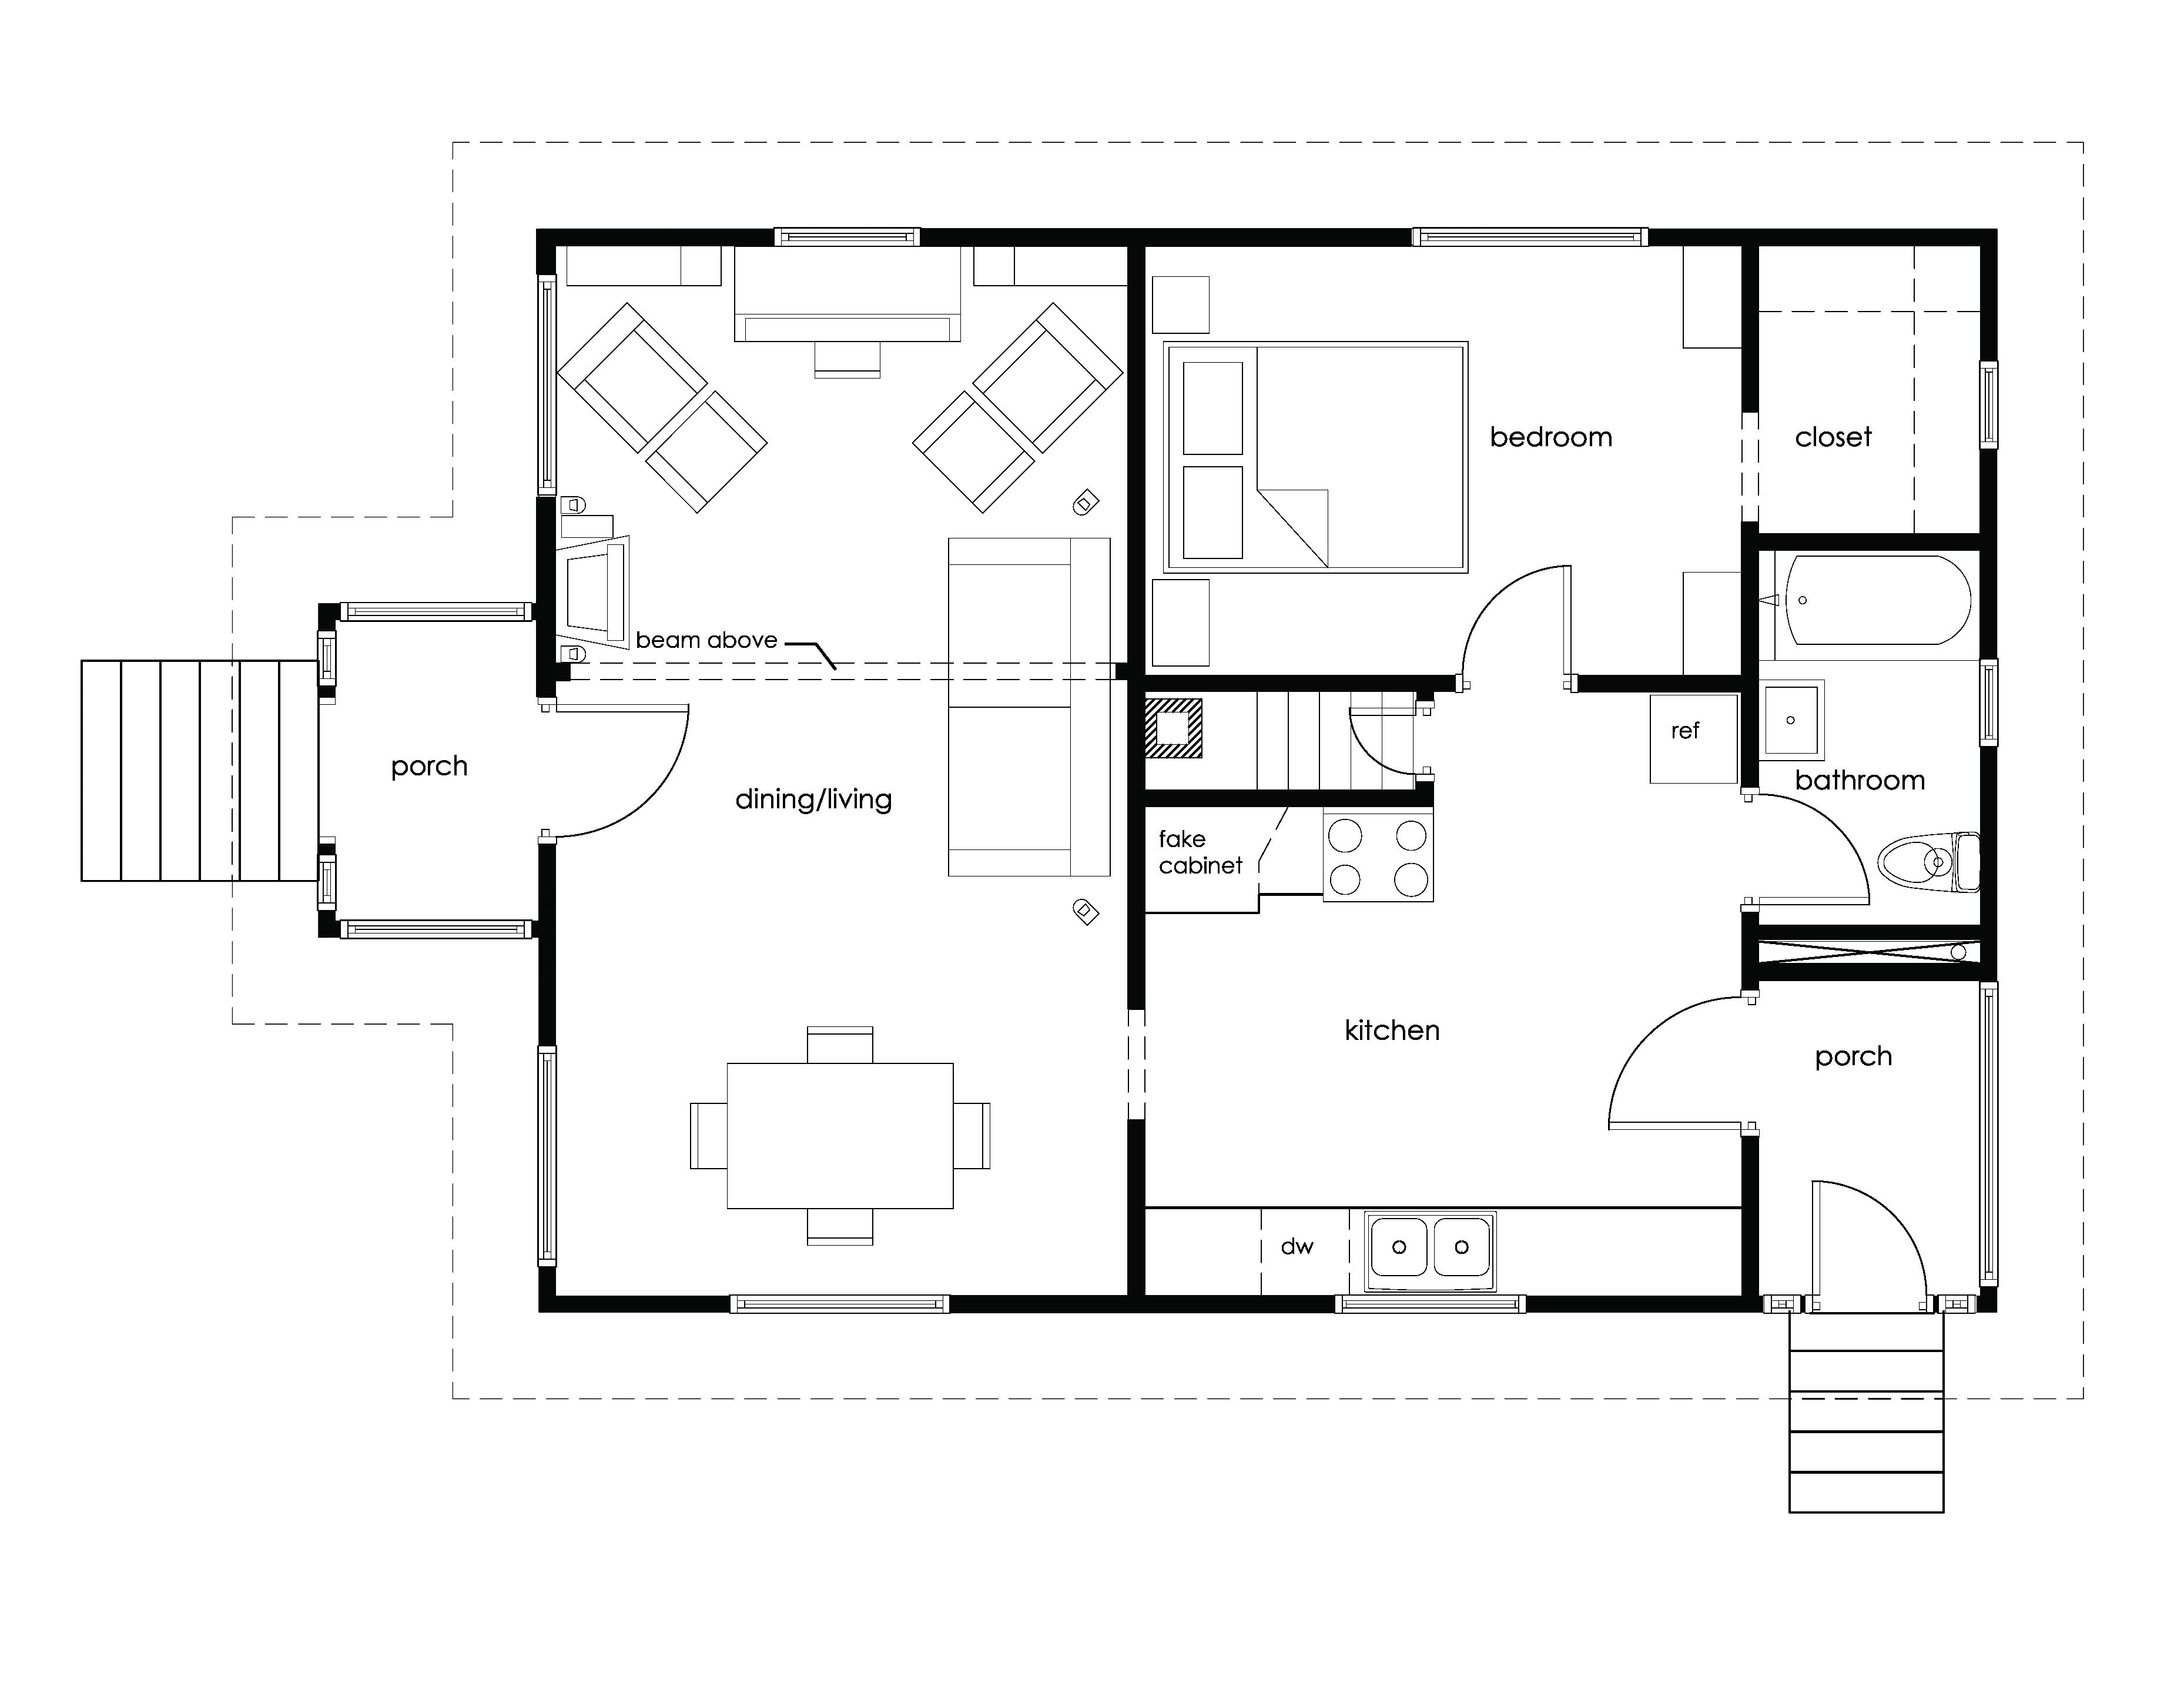
This was the floor plan when we bought the house. We’re pretty sure they weren’t building walk-in closets in the early 20th century so our thought is that the whole back of the house may have been porch space of some sort (since the presence of a bathroom in 1910 is questionable too). Also, as many have commented, our kitchen was a good size, but the FIVE doorways made it pretty inefficient. Also, since it was essentially the hallway of the house, it made it impossible to do any type of center island. We think that there was also a wood burning cooking stove where the stair is now (the stair was definitely added at some point). (Before we tore the chimney out, we noticed an outlet that faced the kitchen.) The “fake cabinet” was added to provide head clearance for the L-shaped stair below. If you lifted up the counter, you saw straight down to the basement.
We’re not really sure what the living/dining layout was meant to be. It made sense to do dining closer to the kitchen, but then you’re left with this odd shaped living space (hence the couch straddling the framed opening).
main floor redesign
The main floor redesign required a few drastic measures. Fortunately, we were able to phase the work by doing the bedroom and bathroom first (2008) and then the rest of the floor (2010). The new layout is a much more efficient use of the space and adds a second bedroom (now the nursery) that we didn’t have before. During the second phase, we also added a 200 SF loft above the living room and nursery.


